Table of Contents
Administrator's Manual : PhotoComp
Installation
Installation is done via glFusion's automatic plugin installer. Visit the Plugin administration page, upload the plugin and click “Install”
Configuration
Configuration of global options is done via glFusion's central configuration manager (Command and Control → Configuration → Photocomp).
Administration
Administration of competition elements is carried out from the Command and Control “Photocomp” option.
Note: When the plugin is first installed you should set up Divisions, Classes and Sections before adding Events.
Entries
Classes
Classes represent the topic or theme of the images in the competition. An event may be restricted to a single class, e.g. “Human Interest”, or may allow the entrant to select any class from the designated class list. See [Events].
 Class lists are shown on the left, individual classes on the right. The class list has only a short name (which can be used to control the sort order) and a description. Add a new Class or List by clicking the (+) icon at the top of the list. Edit an existing item by clicking the pencil icon show to its right.
You can enable and disable individual items by clicking the green (if enabled) or grey (if disabled) indicator next to the pencil icon. Disabling a class or list will prevent it from appearing in selections but will not affect events or entries that are already using that item.
Editing a Class

When a class is added or edited, the following fields are available:
| Name | An optional short name for the class. If available, this will be used as the filename for interstitial slide images (see [Reports]). |
|---|---|
| Description | A short text description or name for the class. Required |
| Enabled | If checked, the class is enabled and available for use. If unchecked it will be hidden from selection options |
| Long Description | An optional long text description for the class, such as the requirements for the class. This will be used in the interstitial text slides for slideshows (See [Reports]). |
Note that the “Delete” button is only available if the class is NOT associated with any entries. A class that has been used by any entries cannot be deleted (but may be disabled to prevent future use).
Divisions
Divisions represent skill levels for competitions.
Divisions are treated very much like Classes, with lists that contain different divisions. Lists and Divisions are added and edited the same as Classes. These fields are used for a Division:
| Name | A short name for the division. |
|---|---|
| Description | A short description for the division, such as “Novice”, “Amateur”, etc. |
| Level | A numeric indicator of the division's status. This is used to sort entries by skill level, and also to correlate divisions between lists. For example, “Amateur” in one division list may be equivalent to “Intermediate” in another. |
Places
Placement, or Award, lists can created for different events or sections.
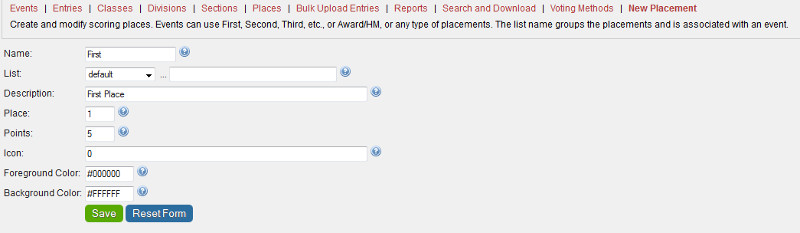
| Name | Name of the placement, e.g. “First” or “Award” |
|---|---|
| List | List to which the placement belongs. Create a new list by typing a new name in the field provided; once created the list name will appear in the selection. |
| Description | A longer description which will be displayed in results pages and reports |
| Place | A numeric value of the placement, e.g. “1” for “First”, “2” for “Second”, etc. |
| Points | If points are accumulated for entrant standings, enter the point value for this placement. |
| Icon | Not currently used |
| Foreground Color Background Color | The placement can be highlighted in winners' listings, if desired. |
Voting Methods
Voting methods are delivered as class files with the plugin, and can be installed as needed. These are only used during online judging.
Sections
Sections are used to create a competition within a competition by tying together a division list, class list, placement list, voting method and media type. This allows different options for Digital versus Print competitions, for example.
Add a new section by clicking “New Section” after clicking “Sections” in the main menu.

| Description | A descriptive title for the section |
|---|---|
| Enabled | Checked to enable the section. If disabled, the section will not be shown in selection options. |
| Section Fee | If a fee is to be charged for each section, enter the per-section fee here. |
| Allowed Media | Check the types of media that are allowed for this section. Digital, Print and Slides are the available options. |
| Division List | Select the division list to be used for this sections. |
| Default Division | The “level” for this default division, for the Default section, is used to set the divisions for new site users. |
| Class List | Select the class list to be used for this section. |
| Online Voting Type | Select the voting method to be used for this section. |
| Scoring List | Select the Placement list to be used for this section. |
Note that sections cannot be deleted but may be disabled.
Reports
A slideshow or catalog may be created from the “Reports” menu. The Catalog contains all images for a time period while the Slideshow is a presentation of images from a single competition. For both report types, you may select to display only the winning images and select how the images are sorted.
When a report is created it is saved as a PDF file in public_html/photocomp/reports to save processing time if an identical report is later requested. You can select “Force Run” to force the recreation of the report, typically if you've included interstitial slides ans subsequently changed the slide images, or if entries have changed since the Catalog was run.
Catalog
For the Catalog, enter the competition year or select a time range. If you enter a competition year, e.g. “2015”, then the time range is based the start of the competition year. Entering a competition year overrides the time range setting.

Slideshow
Slideshows are created for a single event only. There are several configuration options to control the display:
| Select Event | Select the event to be displayed. |
|---|---|
| Add slides between divisions | Check to add an interstitial slide between divisions (see interstitials below). You should ensure that “Division” is set as as sort option. |
| Add slides between classes | Select the type of interstitial slide to show between classes (see interstitials below). You should ensure that “Class” is set as as sort option. |

Interstitials
Slides can be added between Divisions and/or Classes. You can specify a number greater than one to include multiple, identical slides to give the impression of a longer interval for those slides.
For Classes, the slide can be an image or a text description. Image files must be located in private/data/photocomp/slides/class and can be named for the short name set for the class (e.g. “humint.jpg” for “Human Interest”) or for the numeric ID of the class (e.g. “1.jpg” for “Open”, if “Open” is class #1). Priority is given to the numeric ID.
This allows slides to be shared between class lists and even to use the same slide for mulitple classes by sharing the short name, while some classes can be overridden by creating a slide image named with a numeric ID.
If the Text Description is used then the class name and “Long Description” is used instead of the images.
For Divisions, only the image option is available and the same rules are followed as for Class images. The images must be in private/data/photocomp/slides/division.
If any image files are not found, then no interstitial slide is supplied.
Note that you should always ensure that Class and/or Division is included as a sort option. Otherwise you might end up with interstitial slides between evary image.
